1、Spring注解编程发展过程
1.1 Spring 1.x
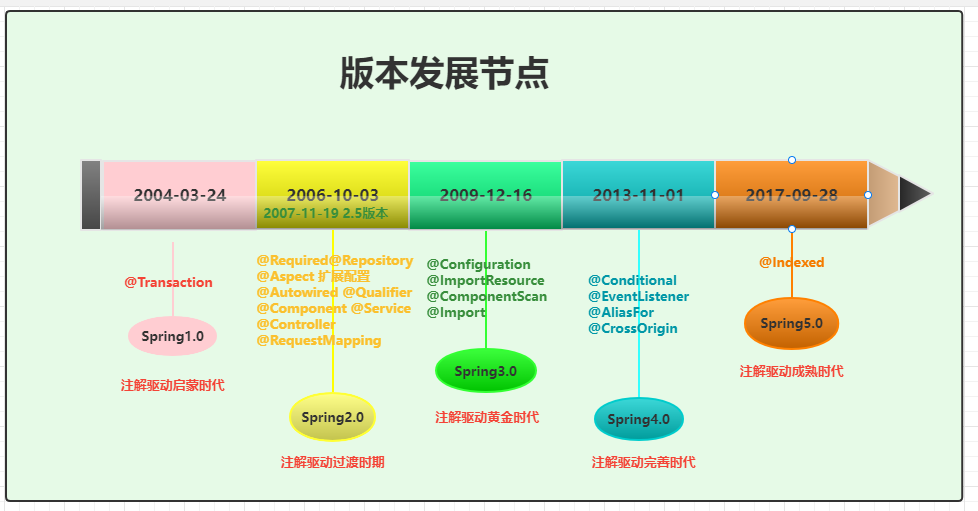
2004年3月24日,Spring1.0正式发布,提供了IoC,AOP及XML配置的方式。
在Spring1.x版本中提供的是纯XML配置的方式,也就是在该版本中我们必须要提供xml的配置文件,在该文件中我们通过<bean>标签来配置需要被IoC容器管理的bean。
1
2
3
4
5
6
7
8
| <?xml version="1.0" encoding="UTF-8"?>
<beans xmlns="http://www.springframework.org/schema/beans"
xmlns:xsi="http://www.w3.org/2001/XMLSchema-instance"
xsi:schemaLocation="http://www.springframework.org/schema/beans
http://www.springframework.org/schema/beans/spring-beans.xsd">
<bean class="com.liyyao.demo.UserService" />
</beans>
|
1
2
3
4
| public static void main(String[] args) {
ApplicationContext ac = new FileSystemXmlApplicationContext("classpath:applicationContext01.xml");
System.out.println("ac.getBean(UserService.class) = " + ac.getBean(UserService.class));
}
|
在Spring1.2版本的时候,提供了**@Transaction**(org.springframework.transaction.annotation)注解。简化了事件的操作。
1.2 Spring 2.x
在2006年10月3日Spring2.0版本问世,在2.x版本中,比较重要的特点是增加了很多注解。
1.2.1 Spring2.5之前
在Spring 2.5之前新增的有@Required @Repository @Aspect,同时也扩展了XML的配置能力,提供了第三方的扩展标签,比如<dubbo>。
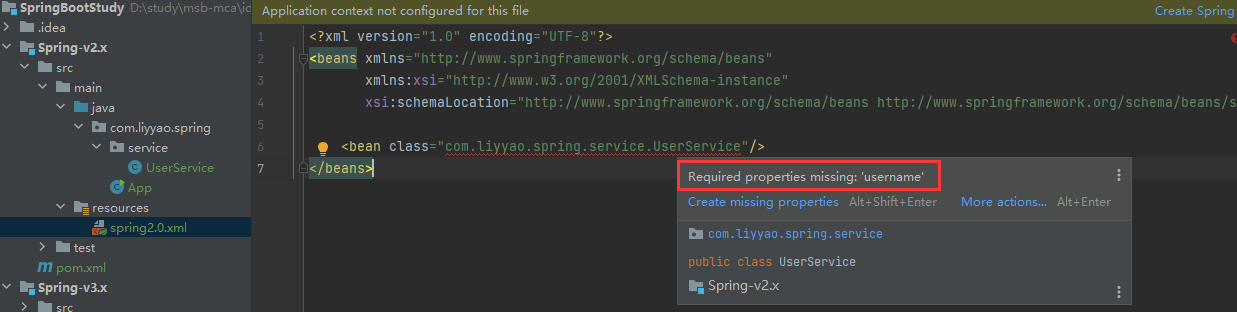
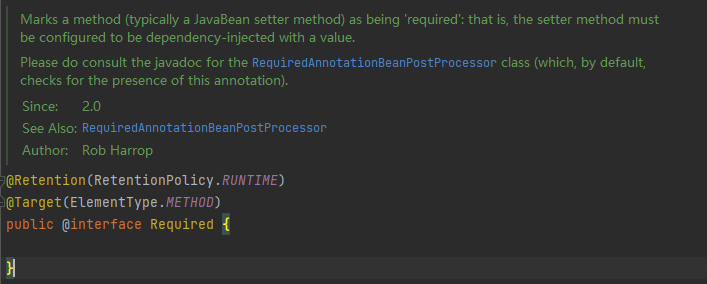
1.2.1 @Required
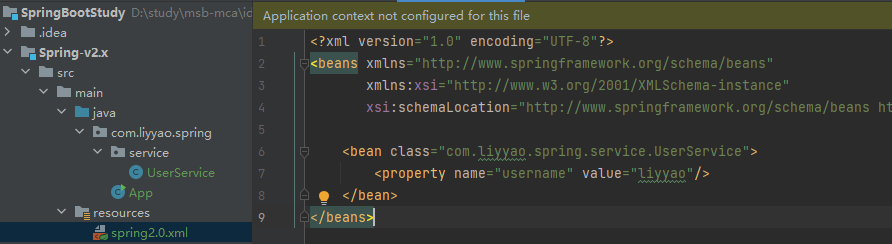
如果你在某个java类的某个set方法上使用了该注解,那么该set方法对应的属性在xml配置文件中必须被设置,否则应付报错。
1
2
3
4
5
6
7
8
9
10
| public class UserService {
private String username;
public String getUsername() {
return username;
}
@Required
public void setUsername(String username) {
this.username = username;
}
}
|
设置好属性后就没有错误提示了
源码中可以看到@Required从2.0开始提供
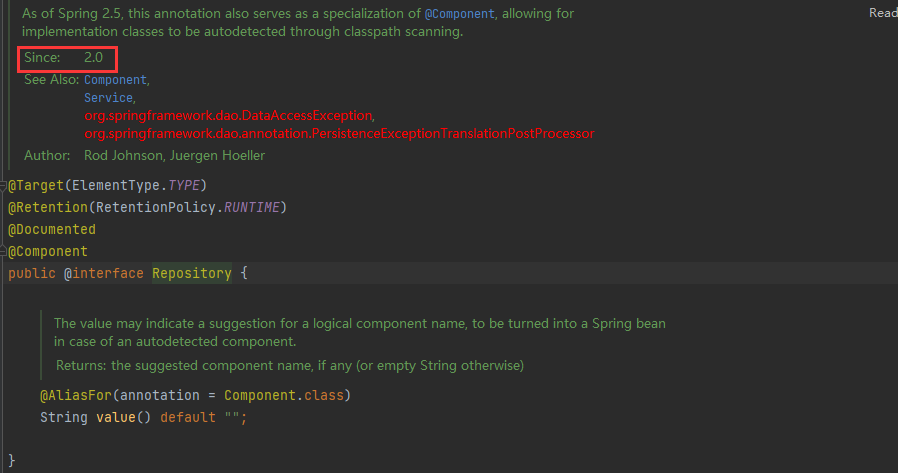
1.2.2 @Repository
@Repository对应数据访问层Bean,这个注解在Spring2.0版本就提供了
1.2.3 @Aspect
@Aspect是AOP相关的一个注解,用来标识配置类。
1.2.2 Spring2.5之后
在2007年11月19日,Spring更新到了2.5版本,新增了很多常用注解,大大的简化配置操作。
| 注解 |
说明 |
| @Autowired |
依赖注入 |
| @Qualifier |
配置@Autowired注解使用 |
| @Component |
声明组件 |
| @Service |
声明业务层组件 |
| @Controller |
声明控制层组件 |
| @RequestMapping |
声明请求对应的处理方法 |
在这些注解的作用下,我们可以不用在xml文件中去注册每个bean,这里我们只需要指定扫描路径,然后在对应的Bean头部添加相关的注解即可,这大大的简化了我们的配置及维护工作。案例如下。
1
2
3
4
5
6
7
8
9
| <?xml version="1.0" encoding="UTF-8"?>
<beans xmlns="http://www.springframework.org/schema/beans"
xmlns:xsi="http://www.w3.org/2001/XMLSchema-instance"
xmlns:context="http://www.springframework.org/schema/context"
xsi:schemaLocation="http://www.springframework.org/schema/beans http://www.springframework.org/schema/beans/spring-beans.xsd
http://www.springframework.org/schema/context http://www.springframework.org/schema/context/spring-context.xsd">
<context:component-scan base-package="com.liyyao"/>
</beans>
|
1
2
3
4
5
6
| @Repository
public class UserDao {
public void query() {
System.out.println("dao query...");
}
}
|
1
2
3
4
5
6
7
8
9
| @Service
public class UserService {
@Autowired
private UserDao userDao;
public void query() {
userDao.query();
}
}
|
1
2
3
4
5
6
7
8
| @Controller
public class UserController {
@Autowired
private UserService service;
public void query() {
service.query();
}
}
|
1
2
3
4
5
6
7
| public class App {
public static void main( String[] args ) {
ClassPathXmlApplicationContext ac = new ClassPathXmlApplicationContext("spring2.0.xml");
UserController bean = ac.getBean(UserController.class);
bean.query();
}
}
|
虽然在Spring2.5版本提供了很多的注解,也大大的简化了开发,但是仍然没有摆脱XML配置驱动。
1.3 Spring 3.x
在2009年12月16日发布了Spring3.0版本,这是一个注解编程发展的里程碑版本,在该版本中全面拥抱Java5,提供了@Configuration注解,目的就是去XML化,同时通过@ImportResource来实现Java配置类和XML配置的混合使,用来平稳过渡。
1.3.1 @Configuration
1
2
3
4
5
6
7
8
9
10
11
12
13
14
15
|
@Configuration
public class JavaConfig {
@Bean
public UserService userService() {
return new UserService();
}
}
|
在Spring3.1版本之前配置扫描路径我们还只能在XML配置文件中通过component-scan标签来实现,在3.1之前还不能够完全实现去XML配置,在3.1版本提供了一个@ComponentScan注解,该注解的作用是替换掉XML中的component-scan标签,是注解编程很大的进步,也是Spring实现无配置化的坚实基础。
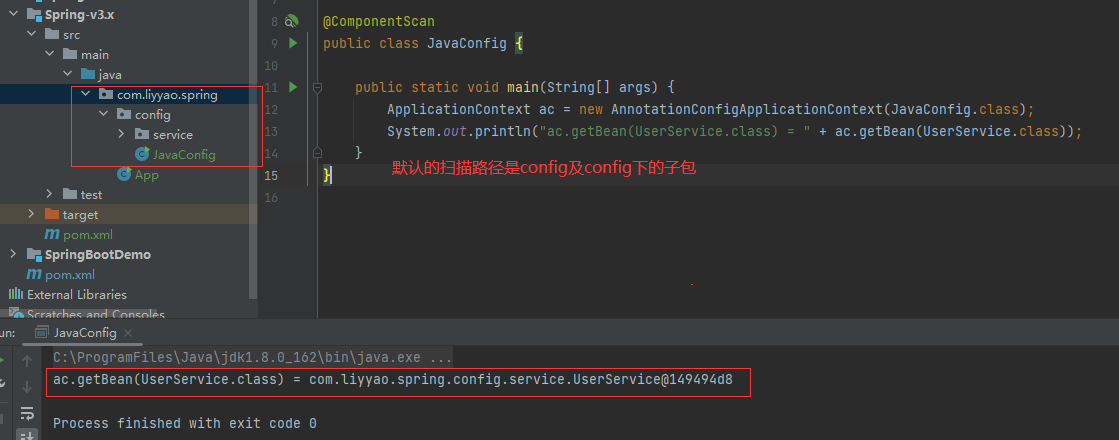
1.3.2 @ComponentScan
@ComponentScan的作用是指定扫描路径,用来替代在XML中的<component-scan>标签,默认的扫描路径是当前注解标注的类所在的包及其子包。
定义UserService
1
2
3
| @Service
public class UserService {
}
|
创建对应的Java配置类
1
2
3
4
5
6
7
| @ComponentScan
public class JavaConfig {
public static void main(String[] args) {
ApplicationContext ac = new AnnotationConfigApplicationContext(JavaConfig.class);
System.out.println("ac.getBean(UserService.class) = " + ac.getBean(UserService.class));
}
}
|
输出结果
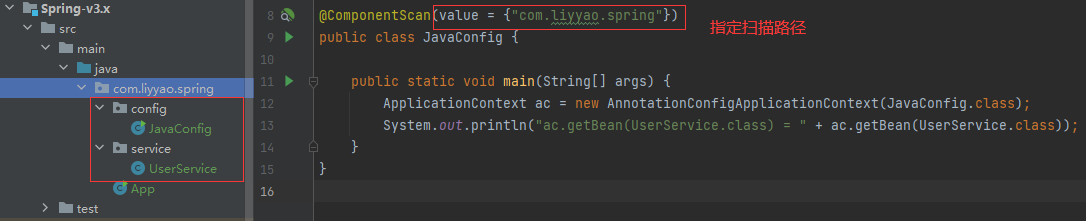
当然也可以指定扫描的路径
1.3.3 @Import
@Import注解只能用在类上,作用是快速的将实例导入到Spring的IoC容器中,将实例导入到IoC容器中的方式有很多种,比如@Bean注解,@Import注解可以用于导入第三方包。具体的使用方式有三种。
1.3.3.1 静态导入
静态导入的方式是直接将我们需要导入到IoC容器中的对象类型直接添加进去即可。这种方式的好处是简单,直接,但是缺点就是如果要导入的类比较多,就不方便了,不够灵活。
1
2
3
| @Service
public class UserService {
}
|
1
2
3
4
5
6
7
| @Import(value = {UserService.class})
public class JavaConfig {
public static void main(String[] args) {
ApplicationContext ac = new AnnotationConfigApplicationContext(JavaConfig.class);
System.out.println("ac.getBean(UserService.class) = " + ac.getBean(UserService.class));
}
}
|

1.3.3.2 ImportSelector导入
@Import注解中我们也可以添加一个实现了ImportSelector接口的类型,这时不会将该类型导入IoC容器中,而是会调用ImportSelector接口中定义的selectImports方法,将该方法的返回的字符串数组的类型添加到容器中。
定义两个业务
1
2
3
4
| public class Cache {
}
public class Logger {
}
|
定义ImportSelector接口的实现,方法返回的是需要添加到IoC容器中的对象对应的类型的类全路径的字符串数组,我们可以根据不同的业务需求导入不同的类型的类,会更加灵活些。
1
2
3
4
5
6
| public class MyImportSelector implements ImportSelector {
@Override
public String[] selectImports(AnnotationMetadata importingClassMetadata) {
return new String[]{Logger.class.getName(), Cache.class.getName()};
}
}
|
测试代码
1
2
3
4
5
6
7
8
9
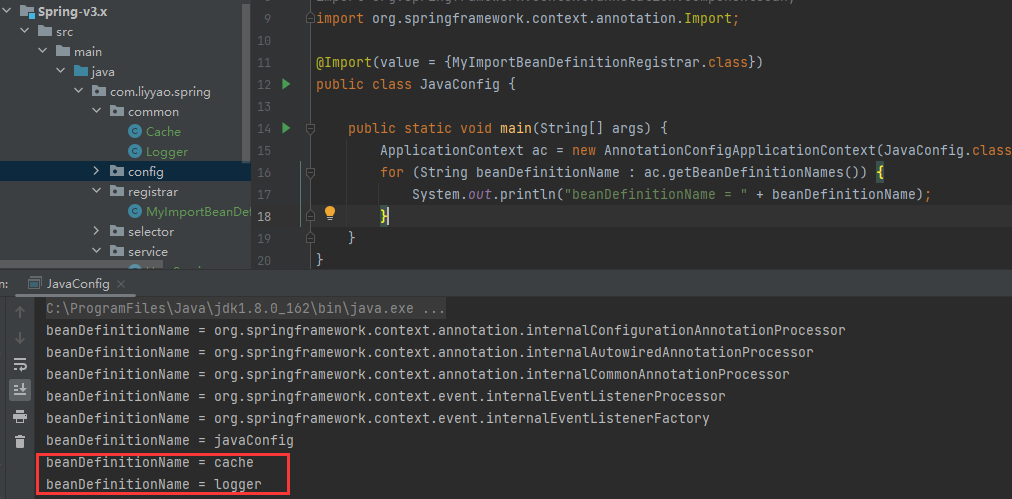
| @Import(value = {MyImportSelector.class})
public class JavaConfig {
public static void main(String[] args) {
ApplicationContext ac = new AnnotationConfigApplicationContext(JavaConfig.class);
for (String beanDefinitionName : ac.getBeanDefinitionNames()) {
System.out.println("beanDefinitionName = " + beanDefinitionName);
}
}
}
|
输出结果

1.3.3.3 ImportBeanDefinitionRegistrar导入
除了上面所介绍的ImportSelector方式灵活导入以外,还提供了ImportBeanDefinitionRegistrar接口,也可以实现Bean的导入,相比ImportSelector接口的方式,ImportBeanDefinitionRegistrar的方式是直接在定义的方法中提供了BeanDefinitionRegistry,自己在方法中实现注册。
1
2
3
4
5
6
7
8
9
10
11
| public class MyImportBeanDefinitionRegistrar implements ImportBeanDefinitionRegistrar {
@Override
public void registerBeanDefinitions(AnnotationMetadata importingClassMetadata, BeanDefinitionRegistry registry) {
RootBeanDefinition cache = new RootBeanDefinition(Cache.class);
registry.registerBeanDefinition("cache", cache);
RootBeanDefinition logger = new RootBeanDefinition(Logger.class);
registry.registerBeanDefinition("logger", cache);
}
}
|
测试代码
1
2
3
4
5
6
7
8
9
| @Import(value = {MyImportBeanDefinitionRegistrar.class})
public class JavaConfig {
public static void main(String[] args) {
ApplicationContext ac = new AnnotationConfigApplicationContext(JavaConfig.class);
for (String beanDefinitionName : ac.getBeanDefinitionNames()) {
System.out.println("beanDefinitionName = " + beanDefinitionName);
}
}
}
|
输出结果
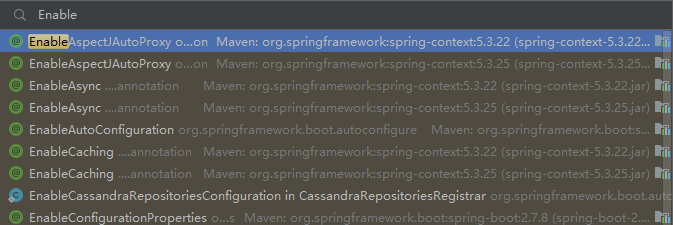
1.3.4 @EnableXXX
@Enable模块驱动,其实是在系统中我们先开发好各个功能独立的模块,比如Web MVC模块,AspectJ代理模块,Caching模块等。
案例说明,先定义好功能模块
1
2
3
4
5
6
7
8
9
10
|
@Configuration
public class HelloWorldConfiguration {
@Bean
public String helloWorld() {
return "Hello World";
}
}
|
然后定义@Enable注解
1
2
3
4
5
6
7
8
9
10
|
@Target(ElementType.TYPE)
@Retention(RetentionPolicy.RUNTIME)
@Documented
@Import(HelloWorldConfiguration.class)
public @interface EnableHelloWorld {
}
|
测试代码
1
2
3
4
5
6
7
8
9
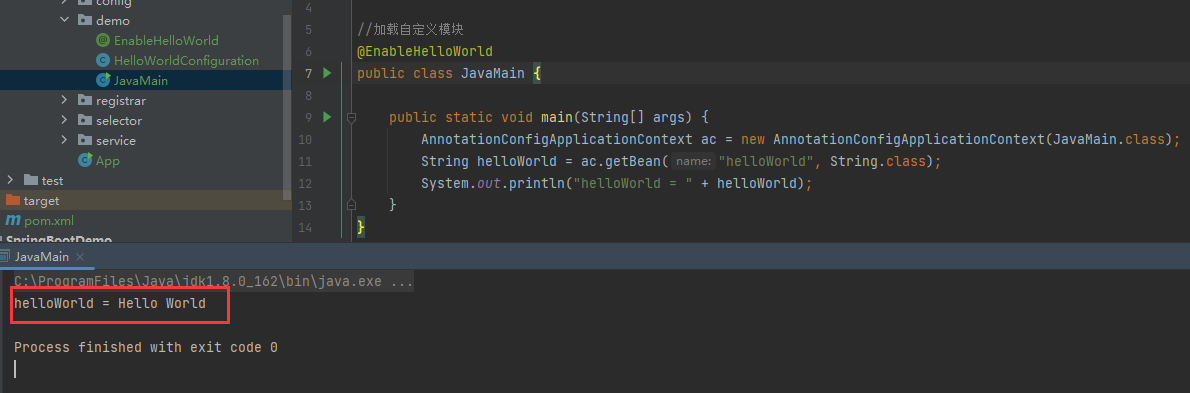
|
@EnableHelloWorld
public class JavaMain {
public static void main(String[] args) {
AnnotationConfigApplicationContext ac = new AnnotationConfigApplicationContext(JavaMain.class);
String helloWorld = ac.getBean("helloWorld", String.class);
System.out.println("helloWorld = " + helloWorld);
}
}
|
输出结果
1.4 Spring 4.x
2013年11月1日更新的Spring4.0,完全支持Java8。这是一个注解完善的版本,提供的核心注解是@Conditional条件注解。@Conditional注解的作用是按照一定的条件进行判断,满足条件就给容器注册Bean实例。
@Conditional的定义行为
1
2
3
4
5
6
7
8
9
10
|
@Target({ElementType.TYPE, ElementType.METHOD})
@Retention(RetentionPolicy.RUNTIME)
@Documented
public @interface Conditional {
Class<? extends Condition>[] value();
}
|
Condition是个接口,需要实现matches方法,返回true则注入bean,返回false则不注入。
案例讲解
1
2
3
4
5
6
7
8
9
| /**
* 定义一个Condition接口的实现
*/
public class MyCondition implements Condition {
@Override
public boolean matches(ConditionContext context, AnnotatedTypeMetadata metadata) {
return false; //默认返回false
}
}
|
创建Java配置类
1
2
3
4
5
6
7
8
9
10
11
12
13
14
15
16
17
18
| public class JavaConfig {
@Conditional(MyCondition.class)
@Bean
public PersonService personService() {
return new PersonService();
}
public static void main(String[] args) {
ApplicationContext ac = new AnnotationConfigApplicationContext(JavaConfig.class);
for (String beanDefinitionName : ac.getBeanDefinitionNames()) {
System.out.println("beanDefinitionName = " + beanDefinitionName);
}
}
}
|
测试
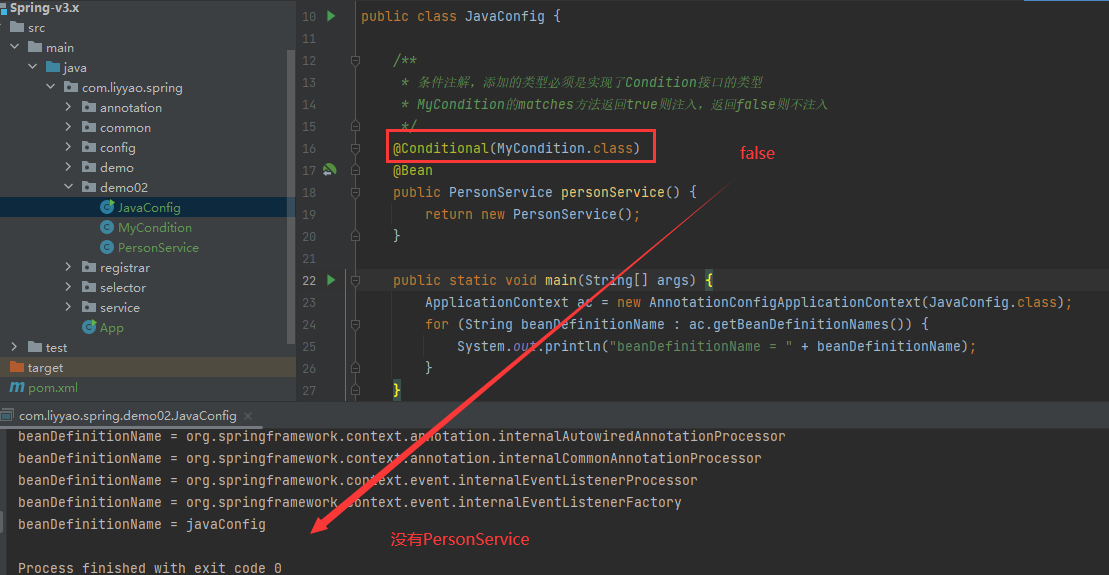
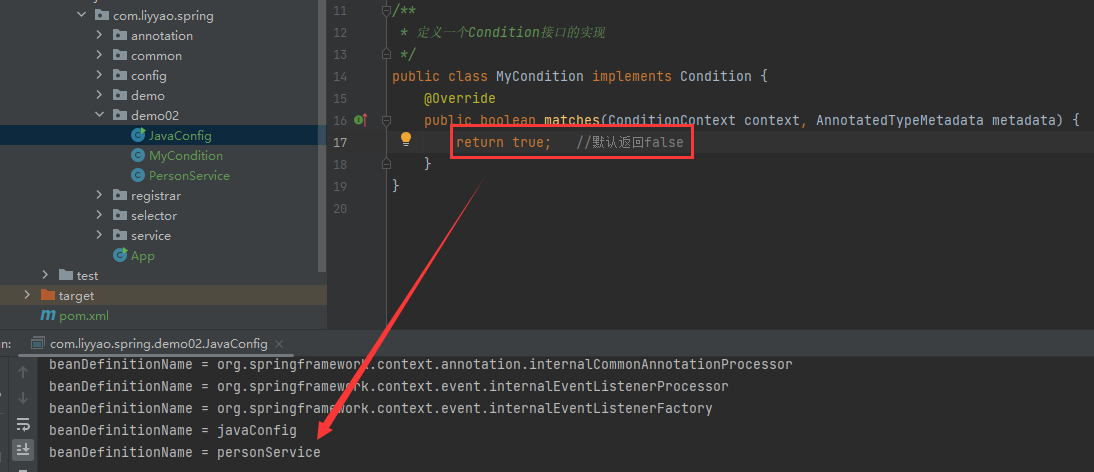
所以@Conditional的作用就是给我们提供了对象导入IoC容器的条件机制,这也是SpringBoot中的自动装配的核心关键。当然在4.x还提供了一些其他的注解,比如@EventListener作为ApplicationListener接口编程的第二选择,@AliasFor解除注解派生的时候冲突限制。@CrossOrigin作为浏览器跨域资源的解决方案等。
1.5 Spring 5.x
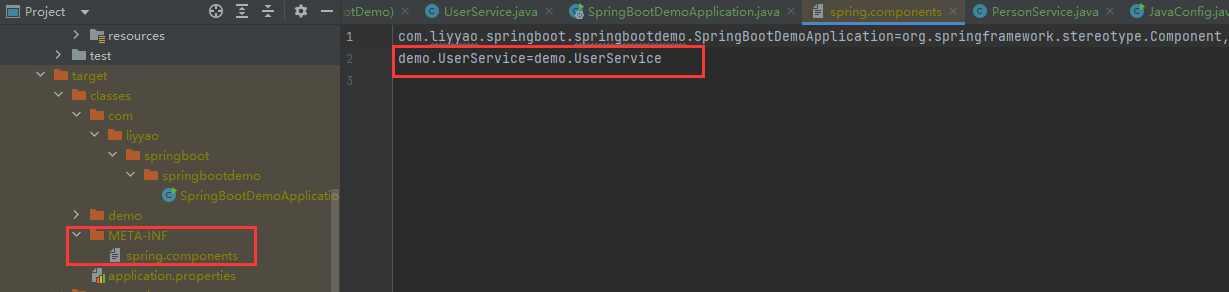
在2017年9月28日,Spring来到了5.0版本。5.0同时也是SpringBoot2.0的底层。注解驱动的性能提升方面不是很明显。在SpringBoot应用场景中,大量使用@ComponentScan扫描,导致Spring模式的注解解析时间增大,因此,5.0版本引入**@Indexed**注解,为Spring模式添加索引。
当我们在项目中使用了@Indexed之后,编译打包的时候会在项目中自动生成META-INF/spring.components文件,当Spring应用上下文执行ComponentScan扫描时,META-INF/spring.components将会被CandidateComponentsIndexLoader读取并加载,转换为CandidateComponentsIndex对象,这样的话@ComponentScan不再扫描指定的package,而是读取CandidateComponentsIndex对象,从而达到提升性能的目的。
1
2
3
4
| <dependency>
<groupId>org.springframework</groupId>
<artifactId>spring-context-indexer</artifactId>
</dependency>
|
使用@Indexed注解
1
2
3
| @Indexed
public class UserService {
}
|
编译打包后的结果